If you’re new to the trade show circuit and the world of exhibiting, you probably feel a bit overwhelmed by all the display systems on the market. We’ll get into the details of different types of banner stand displays, and some of the terms you probably need to know more about.
The banner stand is a type of display that has a serious identity crisis happening: it’s also known as a roll-up, a pop-up banner (easily confused with a Pop-Up Display) and a pull-up screen, amongst other things. No matter what you call it, these are most of the features you’ll find when shopping for the system that’s right for you.
BANNER STAND HARDWARE: THE BASICS
The Base
The base of a banner stand is the hardware component that sits on the floor, and there are several different features depending on the type of banner stand you’re looking at.
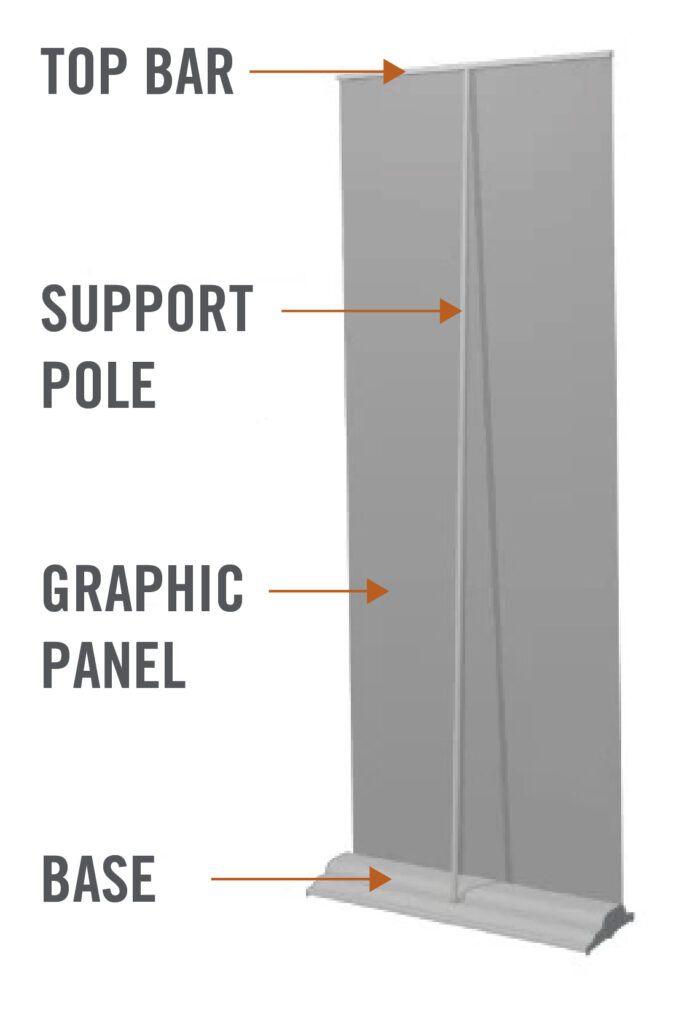
Some bases are hollow and contain a roller mechanism, allowing the graphic to retract and be stored inside. To ensure the display is stable, these “retractable” bases are either wide and flat (like the Deluxe) or come with one or more stabilizing “feet” that rotate out 90° from the base (like the Retractable). Neither option is more stable than the other, it’s a simple matter of the look you prefer, and the price.
The bases on other banner stands could be a tripod-style foot (like the Dash). Tension-style banner stands (like the X-Stand) have no base at all, and the graphic sits on or slightly above the floor, supported by the frame at the back of the unit.
The Support pole
This is the tubular piece of hardware (usually under an inch in diameter) that connects to both the base and top bar of your banner stand, holding your graphic upright and in place. They tend to come in two main styles, telescoping or shock-corded.
A telescoping pole usually features a main tube section that’s about as long as the base is (if you have a 33” wide base, it’s probably 33” long), with nested sections that telescope out and lock into place. A banner stand with a telescoping pole usually features a graphic that can be adjusted to different heights.
A shock-corded pole is similar to a tent pole. It features two or three sections of tubing that are held together with a tension cord in the middle, and which snap into place during setup. The beauty of a shock-corded pole is that you don’t have to adjust the pole (as you do with a telescoping pole) to ensure your display sets up at the same height each time.
THE TOP BAR
Although this hardware component is often overlooked, the style and quality can often play a large role in the overall quality of your banner stand. It is part of both retractable and manual banner stand models, and its function is to hold the top of the graphic panel in place.
Top bars come in a variety of styles; some clamp to the top of the graphic, others rely on double-sided tape to hold them in place. Some connect to the support pole with a hook (like the Retractable) and others connect at the back of the top bar to create a more seamless look, like the Deluxe.
A cheap top bar, or one that hasn’t been installed properly on the graphic, can cause several problems. If the install is poorly done you’ll see wrinkles or creases in your graphic. Cheaper top bars can also be easily bent out of shape, meaning your banner stand will appear uneven and wonky when it’s set up. Worse case scenario? If the top bar detaches from the graphic on a retractable-style banner stand it will retract into the base, likely get damaged as that happens, and you won’t be able to setup your display until a professional rewinds the spring.
BANNER STAND GRAPHICS: THE BASICS
The graphic is, of course, the printed part of your banner stand. This is where your message, your brand and your imagery will go. When you’re shopping around, be sure to check whether or not the graphic is included in the price, or sold separately.
You also have to consider the design. Your graphic is the material; your design is what goes on it. Whether you do this yourself, hire a designer, or use our in-house production team, the design is almost always a separately priced component. When it comes to graphics, there is so much to be said that we’ve already written an entire knowledge-base article about it.
Your banner stand graphic makes up a large portion of the overall cost, and this is what causes the greatest discrepancy in price points. When you’re shopping for a banner stand, be sure you know what kind of graphic you’re getting.
DOES YOUR TRADE SHOW DISPLAY FEATURE:
- A glossy or matte finish? Glossy finishes, on upright displays like a banner stand, make it difficult to see the message clearly.
- A warranty against fading or delaminating? Cheap graphics can fade over time, or the laminate can peel away from the graphic. If it’s not warrantied, it might not stand the test of time.
- Stop-light backing? With any upright display, like a banner stand, you’ll find yourself dealing with the effect that lighting has around it. If your graphic is printed to stop-light material you won’t need to worry about shadowing affecting your message.
- Paper or laminates? A graphic printed to paper (even laminated) won’t hold up over time. Non-laminated materials are also at a greater risk of ripping or tearing during setup.
BANNER STAND SIZES
Banner Stands come in all shapes and sizes. Your standard, everyday banner stand stands about 7ft tall and about 3ft wide, though every system is slightly different. When size matters, here are some of the features you can look for:
DIFFERENT HEIGHTS
There are miniature banner stands that stand only about 3ft tall (such as the Mini Me) and options to combine a taller support pole with a taller graphic to achieve a banner stand that is closer to 10ft tall.
MULTIPLE HEIGHTS
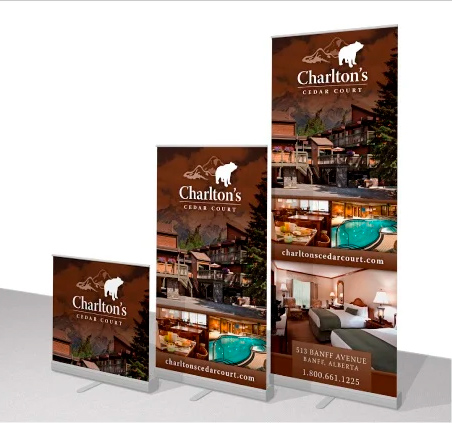
Some banner stands can be set up at several different heights. The graphic needs to be designed to fit the heights you want to use, but let’s look at Charlton’s Resort as an example. With a single banner stand graphic designed to fit three heights, this display can be used at the 7ft height when all three sections of the shock-corded support pole are connected. If only two sections of the support pole are connected it sits at about 5.5ft tall and is perfect for display on a tabletop. If only one section of the support pole is used, then just the top 2.5ft of the graphic is visible and works great on countertops.
DIFFERENT WIDTHS
While the “standard” banner stand is about 3ft wide, other options exist. Our Mini Me is about 2ft wide and 5ft tall, but is also available at the full 7ft height. Our Deluxe banner stand is also available in 4ft and 5ft widths, filling out much more space than a standard banner stand. You’ll find that most places that sell banner stands have wider and narrower options available.
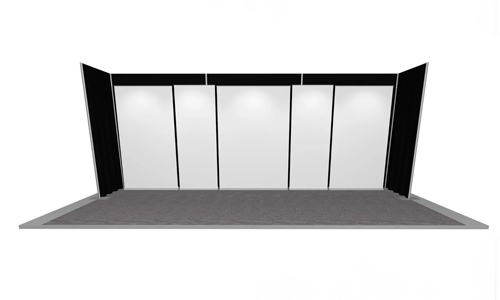
If you want to create a banner stand display that looks very different from the usual set-of-three backwall, try mixing heights and widths. Setup a 4ft wide banner stand between two shorter, 3ft wide ones. Or a 5ft wide between two 2ft wide banner stands.
SHIPPING
When it comes to shipping and transporting a banner stand you really need to know what your needs are. Most banner stands come standard with a soft canvas bag that has some kind of hand or shoulder strap for carrying. You’ll find this is all you need if you have only a few banner stands, and you plan to transport them yourself.
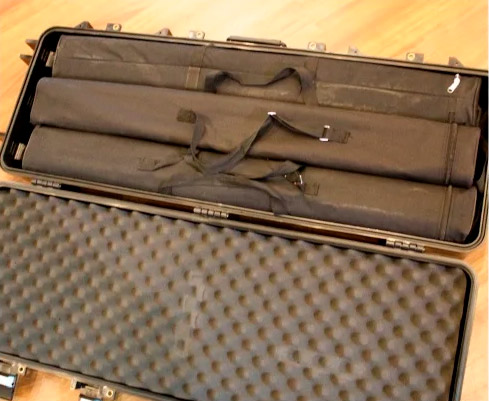
However, those soft carry bags are not FedEx friendly. If you need to ship your banner stands via courier or on a plane, you’ll want to upgrade to a hard shipping case. Most hard shipping cases have room for more than one banner stand, and include wheels, making it easier to transport multiple banner stands. Every hard shipping case is different, so make sure you’re buying one that will fit the size, style and number of banner stands you need
PRICING
If you’ve started doing some research on banner stands, you’ve probably noticed a wide discrepancy on the purchase cost. You can find some priced at under $100 that include the hardware, the graphic and the carry bag. And yet you’ve also gotten quotes from local suppliers for the same banner stand (at least, it looks the same, right?) for $500 or more. What’s the heck is up with that, eh?
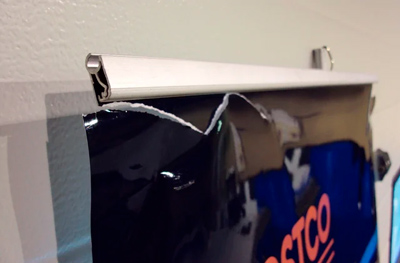
To be perfectly honest, if you only need to use your banner stand once, maybe twice, and then you’re tossing it in the trash, those $99 banner stands will probably serve you just fine. If you expect to use your banner stand more than a few times (which is most of us) you’ll quickly find you get what you pay for at $99.
PRICING FACTORS
- Hardware Quality: You’ll be able to crush the base and/or top bar in your hand like a pop can. This is great if you’re trying to channel your inner Hulk with a “HULK SMASH” but is not great for shipping, or if you have a variety of people handling the setup and take down of your display.
- No Service: Want to change your graphic? Lose the top bar and need to replace it? What if your graphic stops retracting properly? You’ll be buying a whole new banner stand, because the retailer won’t offer these repair services.
- No Warranty: If your graphic starts to fade, or wear, the retailer won’t replace it. And if your hardware is defective, or becomes damaged? You’ll find yourself trying to MacGyver a fix, because the retailer won’t be helping.
- Graphic Quality: The graphics that come with a cheap banner stand either tear easily, are too glossy, the edges curl horribly, the surface becomes scratched after only a few uses, or they fade and delaminate—or all of the above!
When it comes to longevity and quality, you need to be paying at least a few hundred dollars for a decent banner stand!
TYPES OF BANNER STANDS
RETRACTABLE
A banner stand with a hollow base and spring-loaded mechanism that allows you to slide the graphic up and down without manual rolling. Also known as a pull-up banner, or a pull-up screen, or pop-up banner.
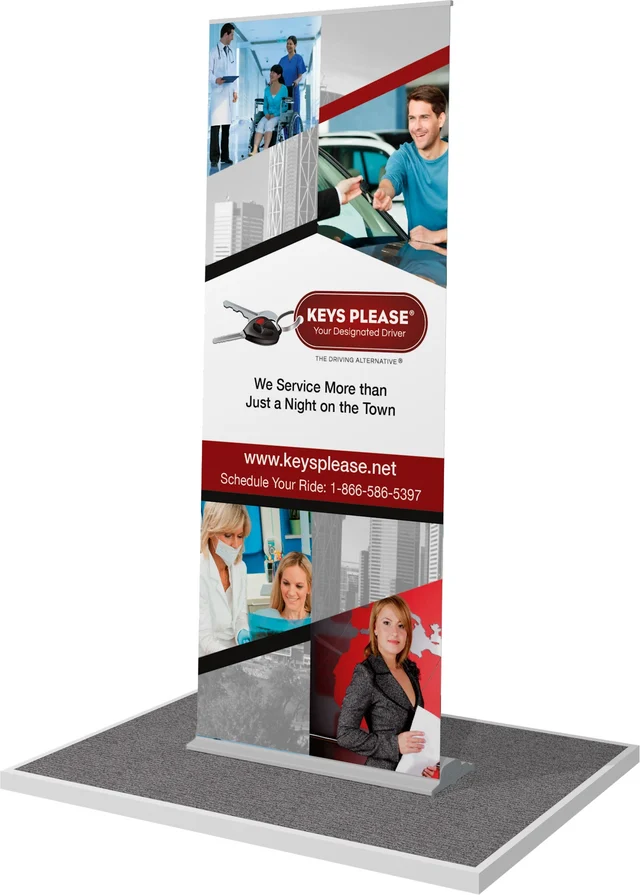
Pros:
- Your graphic is protected inside the base during storage.
- It’s a super fast, very easy setup.
- Some models allow you to switch out the graphic between events.
- The graphic is not handled during setup, keeping it clean and reducing the chance it will be damaged.
- They have a sleek, more expensive look than non-retractable models.
Cons:
- That more expensive look comes at a cost—they are more expensive!
- The mechanism and springs create a greater chance the display hardware will need repairs over time; watch for service and warranty when you buy.
- Tend to be heavier than the non-retractable banner stands.
MANUAL
A banner stand that requires the graphic to be manually unrolled during setup. Also known as a roll-up banner.
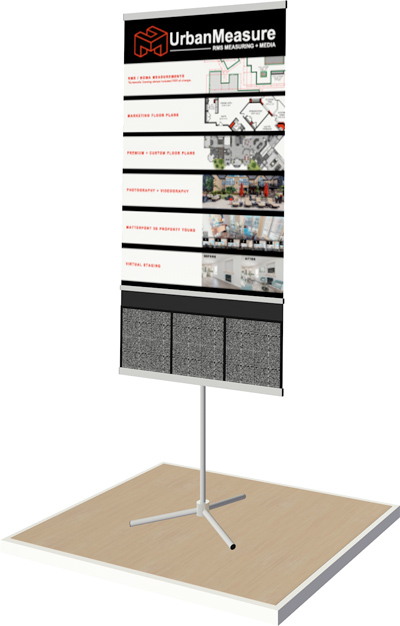
Pros:
- Super lightweight.
- Less expensive than retractable models.
Cons:
- A bit more involved setup, that takes a bit longer than a retractable.
- Because the graphic is handled it’s easier to damage.
- The graphic usually becomes kinked, creased and dirty over time, from handling.
- Graphics can only be replaced by a professional.
TENSION
These types of banner stands rely on a series of interconnected, flexible plastic poles that create a X-shape, to which the graphic is attached, usually via grommets in each corner. It’s also known as an X-stand, or X-style banner.
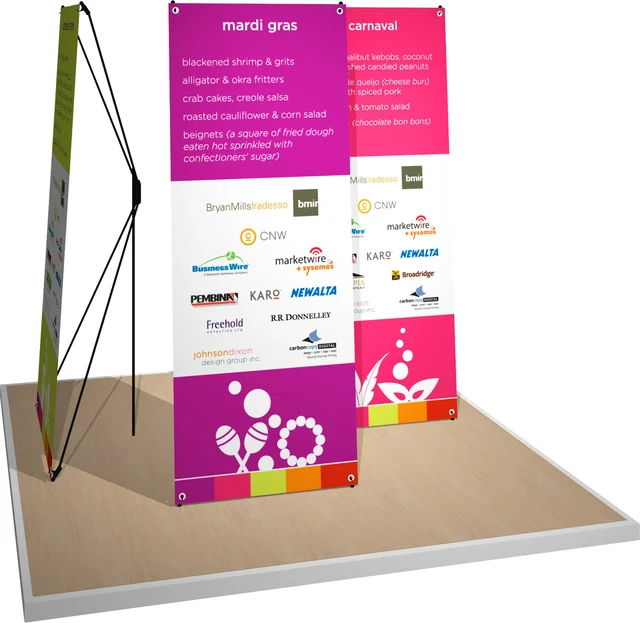
Pros:
- Multiple graphics can be changed whenever you choose, without difficulty.
- Super lightweight.
- Less expensive than other banner stands.
Cons:
- The grommeted-style graphic is less professional looking.
- A more complex setup, taking up to five minutes.
- Small plastic parts are easier to snap or break than the aluminum on other banner stands.
- Because the graphic is handled it’s easier to damage.
- The graphic usually becomes kinked, creased and dirty over time, from handling.
- Graphics can only be replaced by a professional.
THINK OUTSIDE THE BOX
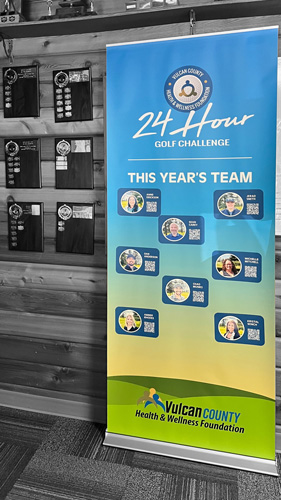
The banner stand has more extended uses than any other display system available. Because they are so easy to transport and setup you can use them all year around, outside of the trade show environment. If you host any kind of event—corporate party, golf tournament, etc.—bring along your banner stand. When you’re not using it elsewhere, leave it setup in your lobby or showroom for additional branding. Set it up in the boardroom during sales meetings or your annual general meeting.
Banner stands also work great partnered with another display. For example, if you have your main brand message on a pop-up or fabric display in your booth space, add a banner stand out front. Its position closer to the aisle draws attention to your booth, and can be used as an exclamation point to enhance your message, or to provide an alternate message—promote a new product, or advertise for recruitment.
And that, my friends, is everything you need to know about Banner Stands. Visit our portable displays page to see more examples of banner stands and imagine what we can do for your next project.
